Installed Logitech Circle View Doorbell Chime-Kit and Hardware Doorbell Chime
Why did I decide to install the chime-kit and doorbell chime after I installed the Logitech doorbell (and it worked fine)? Netatmo released their doorbell and in their FAQ they wrote this about why a chime is required (Logitech never explained but they require it despite their doorbell seemingly working without one):
The Smart Video Doorbell was specially designed to replace your existing doorbell and, therefore, to work with an existing wired chime. This chime is required in your installation because it creates a charge in the doorbell circuit. When someone presses the doorbell button, a switch closes the doorbell circuit causing electricity to flow through the circuit to activate your chime. Without a chime, when the switch closes the circuit, a short circuit would occur and cause damage to your Smart Video Doorbell.
After reading that, I decided to protect the doorbell investment by spending a little bit more time and $15 to install the chime-kit and hardware chime.
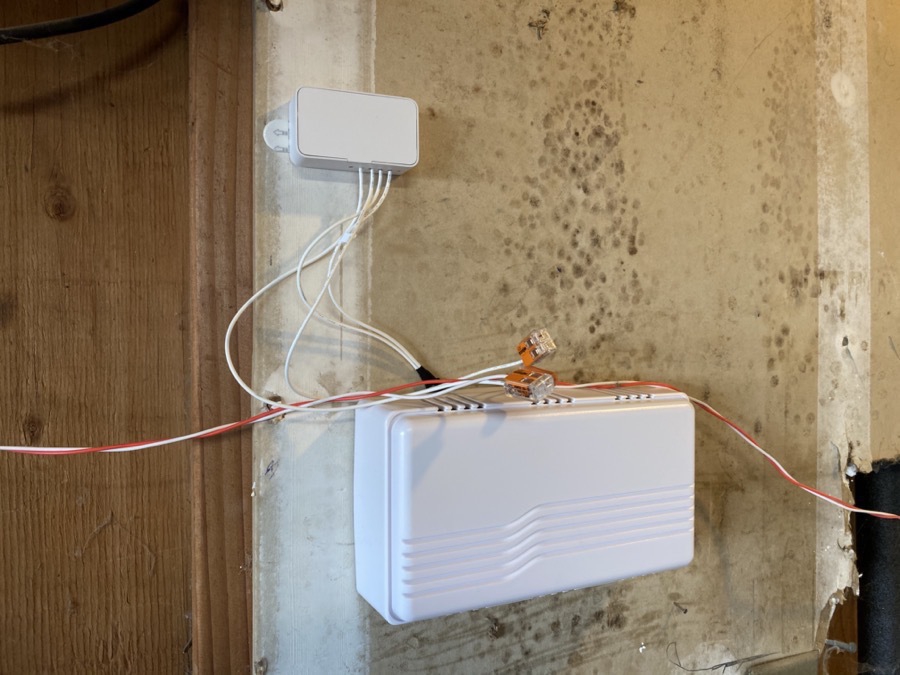
Installing the hardware chime and then the Logitech chime-kit in the garage was easy though I accidentally cut the transformer to doorbell wire; wire nut to the rescue. I did check to see if the doorbell would work with only the chime-kit installed and its switch set to no doorbell – it did. In fact, when I cut power to it, a green LED stayed lit up in the chime-kit above the switch, suggesting it keeps a charge like a hardware doorbell chime. However I don’t know definitively if that chime-kit charge would resolve possible shorting issues on doorbell press. With the chime-kit I can toggle the hardware chime to ring or not via the Home app — I have no idea how Logitech made that work. The chime-kit has a switch for analog chime, digital hardware, no chime, and analog chime.
So far the Logitech doorbell has been great with a perfect view of the front yard and super reliable notifications with videos. Video is pretty sharp and its HDR does work — the shaded porch and bright streetscape are all well exposed. It does well at night with just the almost-bug friendly amber porch light so I’ve disabled the doorbell light to keep light pollution to a minimum. That built-in light does not illuminate far so it is only useful when someone is at the door. So I wish I could set up an automation to turn on the extra light when it detects somebody at the door. I do recommend setting up Activity Zones on an iPad (easier to draw them on a larger video feed vs iPhone) to help minimize notifications. Turns out our street has more vehicle traffic than I realized. I’m very happy I patiently waited for a HomeKit Secure Video doorbell like this. If you think activity zones might limit what the HomeKit home hub detects, it seems as if when there’s motion detected in an activity zone, the HomeKit hub analyzes the entire scene for people, animals and vehicles.
Our data usage for uploads has gone down dramatically now that our Nest Outdoor IQ no longer has Nest Aware and is only useful for on-demand delayed “live” video feeds.
Logitech Chime-Kit at the top and the new hardware chime at the bottom. The included wire splices are nice.

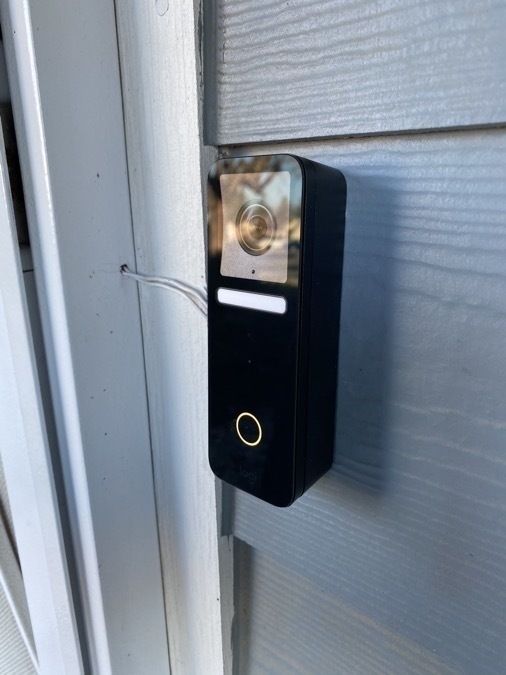
Logitech Circle View Doorbell installed on cement fiber board lap siding, doorbell wire routed through a security door frame and then along the foundation, tucked out of sight between cement foundation and sheathing. I used foam as a spacer behind the straight mount to create space for the wire to come in through the side of the mount. The mounts are made for doorbell wire coming out of a wall, so creative thinking was necessary. Notice how the Logitech logo at the bottom is barely visible. Compare that to a Ring doorbell or the new Netatmo! I love that Logitech decided to not make their logo stand out.
